Building a Kit Car in a Small Garage (or No Garage)
Written by Adam Doyle on Oct 27, 2025
If you're wondering how to build a kit car in a small garage, you're in the right place. Building your dream car doesn't require a commercial-sized shop. This ultimate guide provides practical layouts, mobile tool setups, and phase-by-phase workflows to help you successfully complete your kit car build in a single-car garage, driveway, or even a rented bay.
Table of Contents
- Plan the Workspace
- Small-Garage Tactics That Work
- Break the Build into Phases
- No Garage? You Have Options
Quick Version
- Workspace Plan: Plan the space first, store parts vertically, keep heavy items on dollies, use fold-flat or rolling benches, and label everything.
- Work in Phases: Do the donor teardown outside if possible, get the powertrain running, make it a roller, then finish.
- No Garage Build: If you have no garage, use a 10×20 canopy or a storage unit that allows light work.
Plan Your Workspace (Not Just the Car)
You're going into building your car with a plan; do the same with your workspace. Before you tear into a donor or unpack a single box of parts, take the time to plan out your environment.
Measure Your Kit Car Garage Space
Grab a tape measure and start with the facts: how big is your space? You might not need as much space as you think but you need to know what you are working with. A good range for a small garage kit car build is 10-12 feet wide by 16-20 feet long.
Started building it in my one car garage in Mastic Beach, NY. Just enough room to open one side of the donor
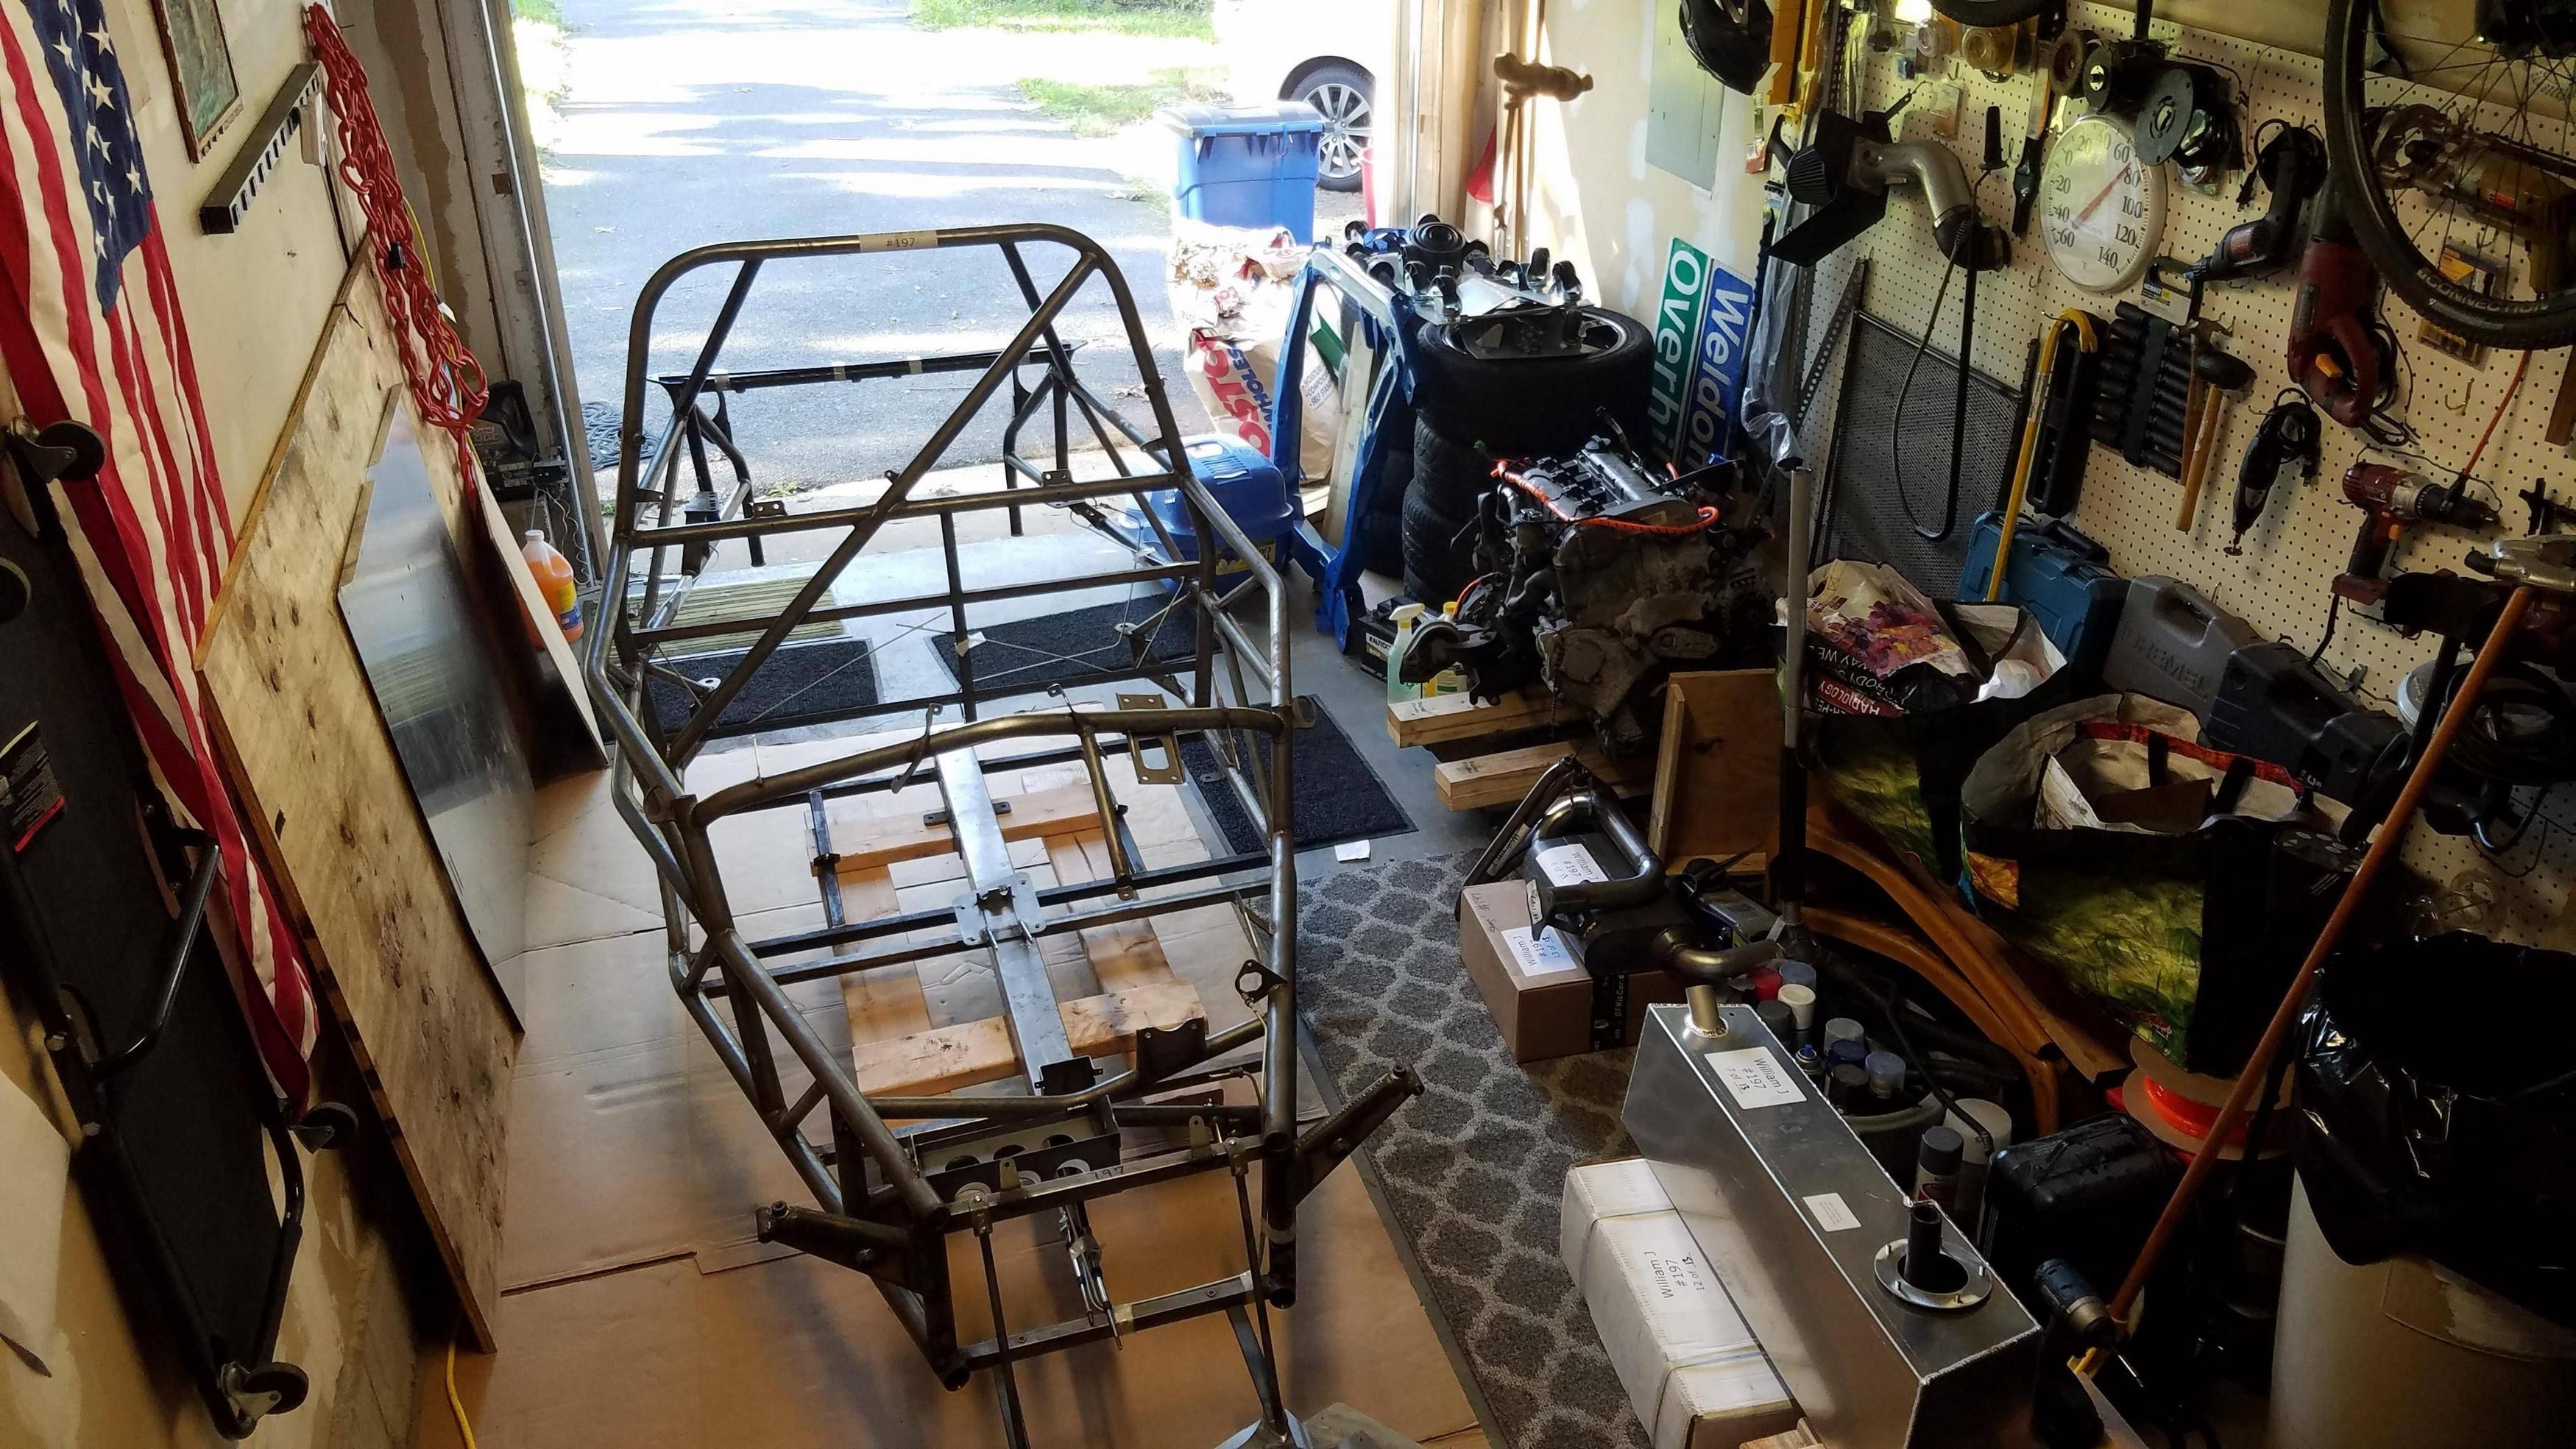
Kit cars are generally smaller than the average daily driver, meaning most can be assembled in a single-car garage. Exoskeletal kit cars, like the DF Goblin, are among the smallest and are ideal for single-car garage projects.
I built in my garage. 8' x 16' will be cramped but doable.
Declutter and Decide What Has to Stay
The more you can move out of your garage, the more room you will have, and the safer your environment will be (get rid of those tripping hazards). If you can't find places to store extra items, consider renting a temporary storage unit or a portable storage container (like a Pod) to empty the garage into while you work on your kit car.
Best to get one of those Pods and put everything from the garage in there… so you have the entire garage to work.
Go Vertical for Kit Car Parts Storage
Think up, not just out. In a small garage, every inch matters, including going vertical. Install shelving or wall organizers to get parts and tools off the floor. Getting items up off the floor also makes it substantially easier to keep your workspace tidy. When you are working in a small area, keeping the floor clear will make the build easier and safer.
Nothing more satisfying than Spring cleaning, new shelves in the garage makes it easy.
Prepare for the Weather
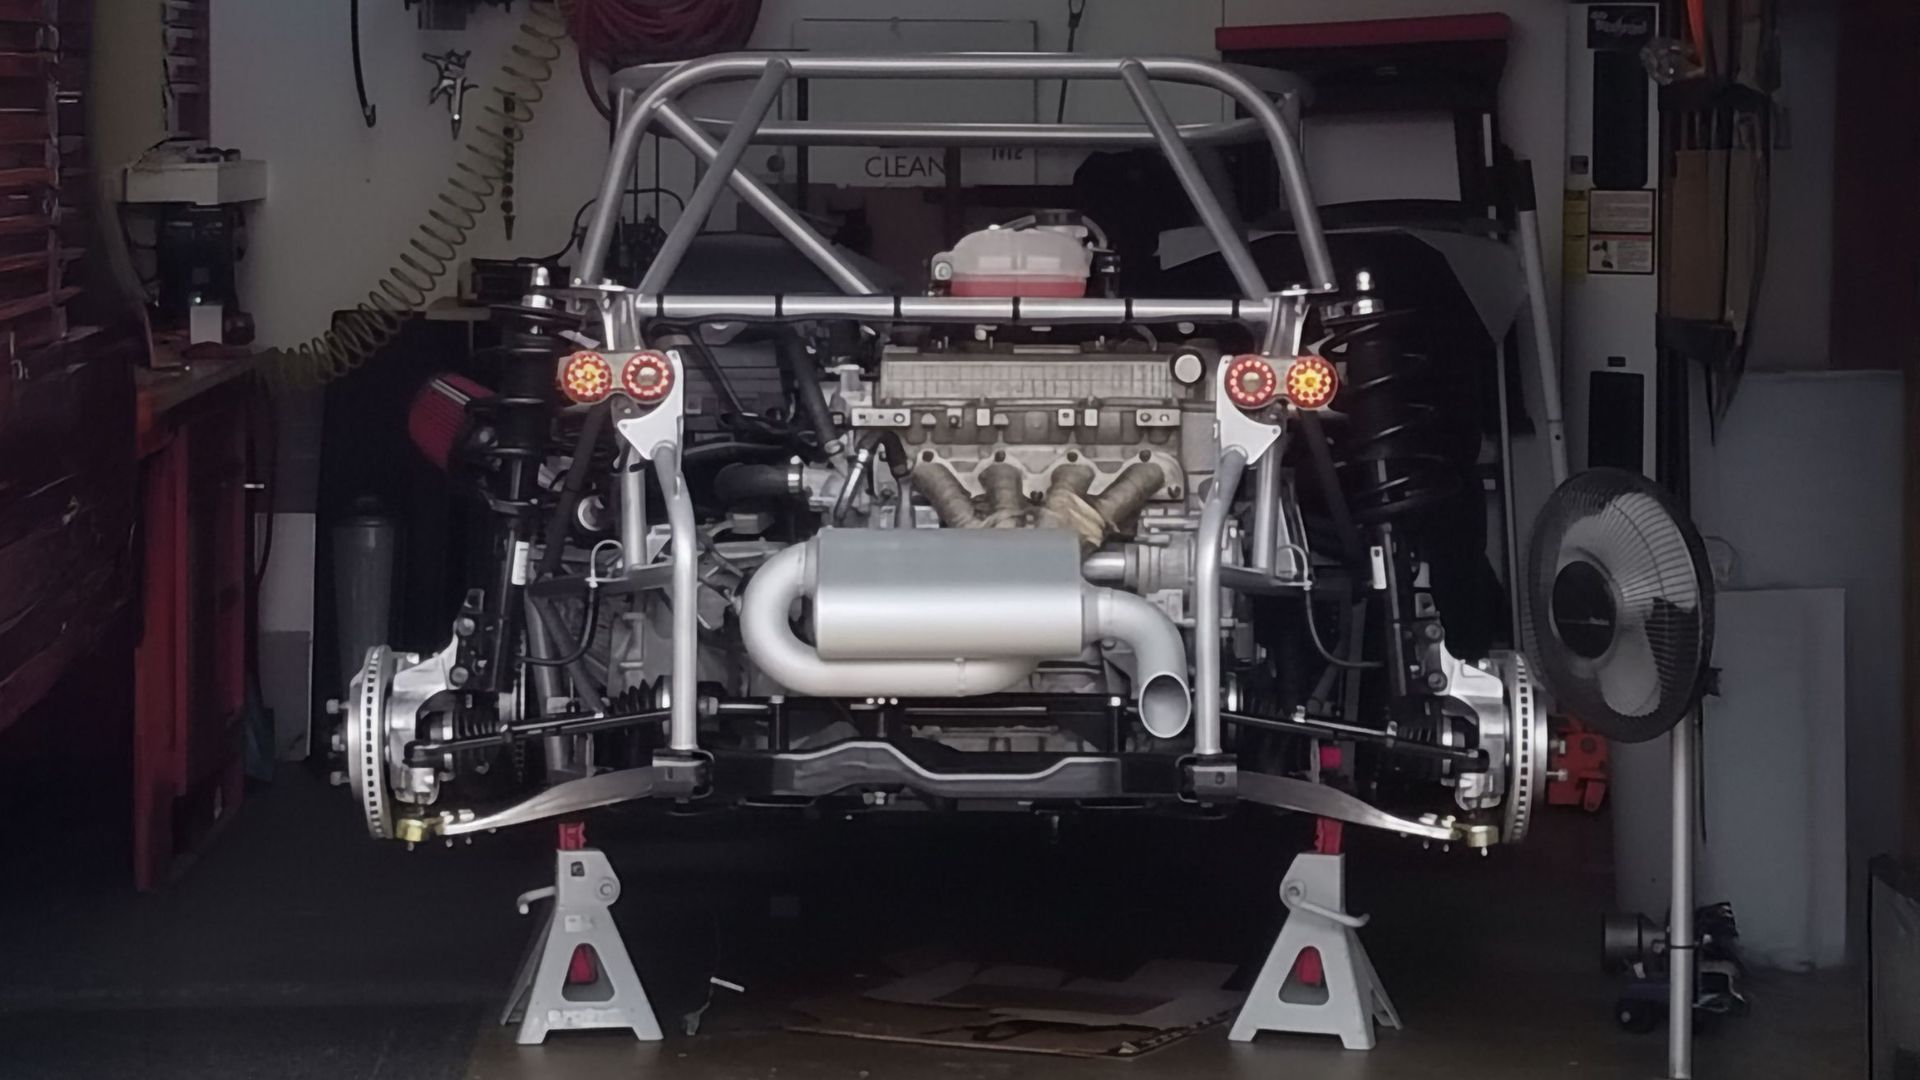
Your small workspace is probably not climate controlled. If it's too hot or too cold outside, things might become unbearable.
- Hot Climate: Make sure you have a decent fan to keep the air moving. For a major comfort upgrade, pick up a portable AC or install a window unit if your space allows for it.
- Cold Climate: An electric heater is ideal but with proper ventilation, you can use forced air heaters. Just be mindful of fire hazards.
I’m doing mine in Michigan in a carport. It’s 10X20. Turbo heater has been my friend.
My wife took out an ad on Facebook for a “free shell” no title... a gentleman came and hauled off the shell. Zero cost to me and minimal effort.
Small-Garage Tactics that Work
Once you’ve squeezed your project into a one-car garage, how do you make the best use of the limited space? The key is mobility and organization.
Mobility is Your Friend
You are going to be playing Tetris with the car and components. You'll often need to move the chassis, powertrain, and other large components to get to the area you need to work on.
The answer to making your life easier is the humble furniture dolly. Throw them under the chassis, the powertrain, and anything else that is awkward to move by yourself.
Those furniture dollies are not very expensive, plus the stuff you drop on them is mobile, a real plus in a small garage.
Smart Use of Workbenches
In tight garages, you won't have room for a dedicated, full-size work table, but you need a flat surface for tasks like rebuilding components or laying out wiring. You'll need to look for foldable, portable, and collapsible options.
- A simple option is a portable folding card table, but be warned that you should protect the top surface with a sheet of plywood.
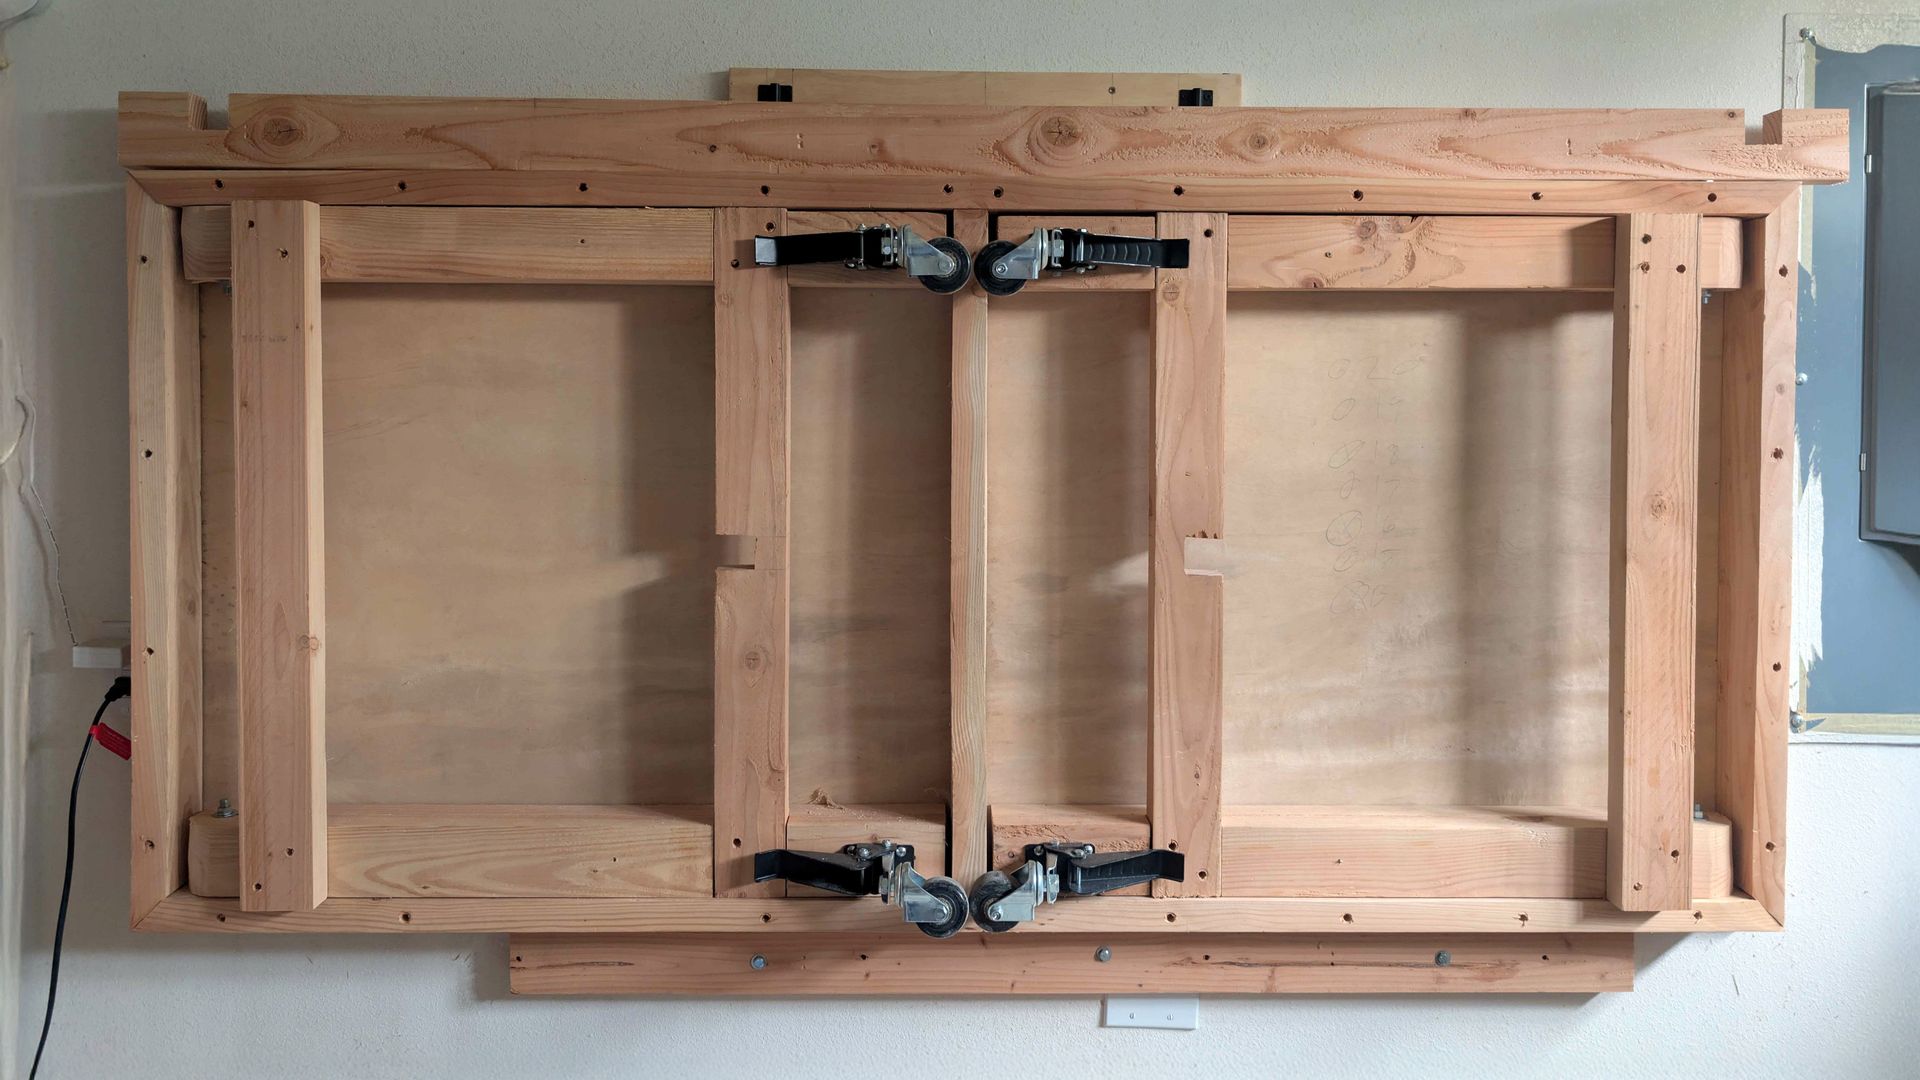
- Alternatively, look into building a DIY solution like a hinged bench that folds down when needed or a roll-around bench that folds flat and hangs on the wall. Example video: Wall-mounted Folding Workbench
Organization is Key for Kit Car Parts
When you are working in a tight space, focus on organization and labeling.
- Every part that can fit in a bin, box, or baggy should be stored with similar components, as loose parts are easy to misplace or mistake for scrap.
- Keep a roll of painter's tape and a Sharpie handy so that you can label everything. Life will be a lot easier when you aren't attempting to identify parts by memory.
Organization is key and label stuff and wires! Label stuff you think you know where it goes and stuff you don't know.
Break the Build into Manageable Phases
One of the smartest tactics for a space-limited project is to divide the build into manageable phases. Don't attempt to do the whole project in one go, as you don't have the space to store it.
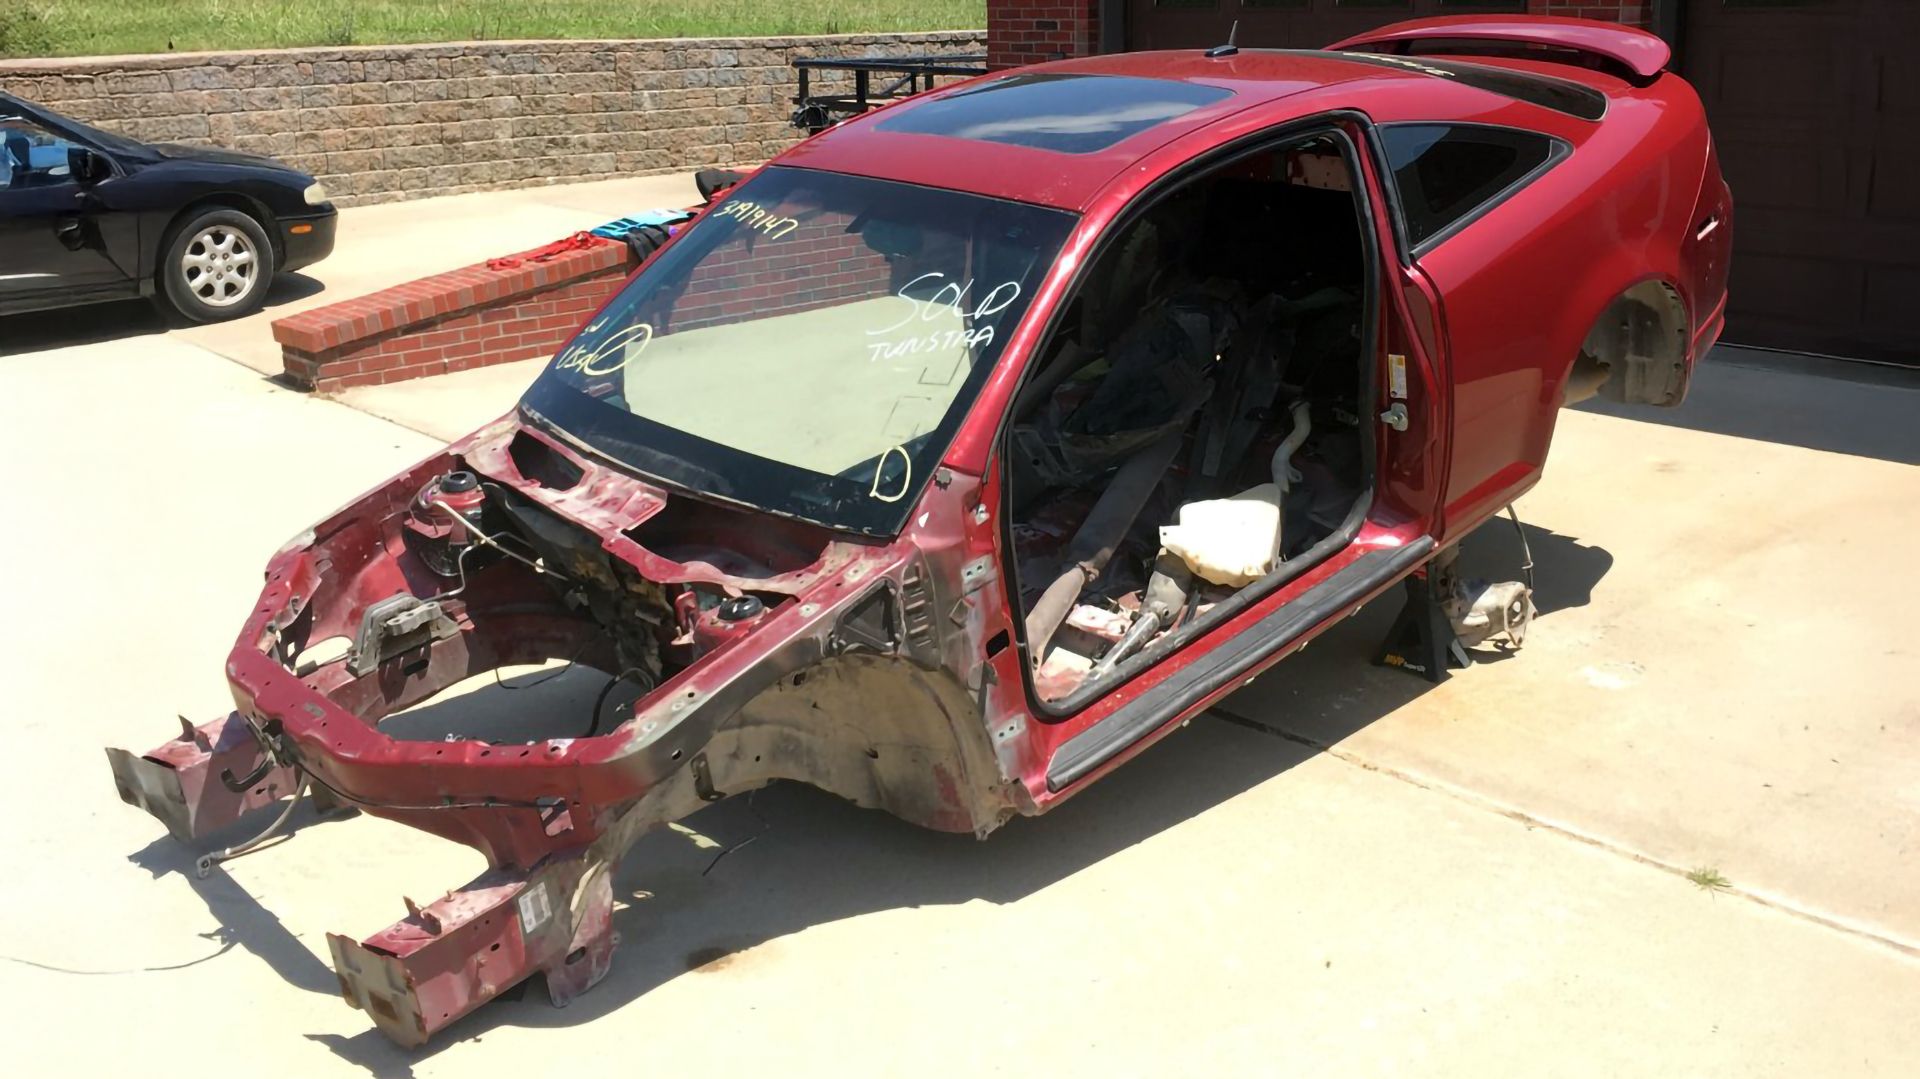
Phase 1: The Donor Teardown
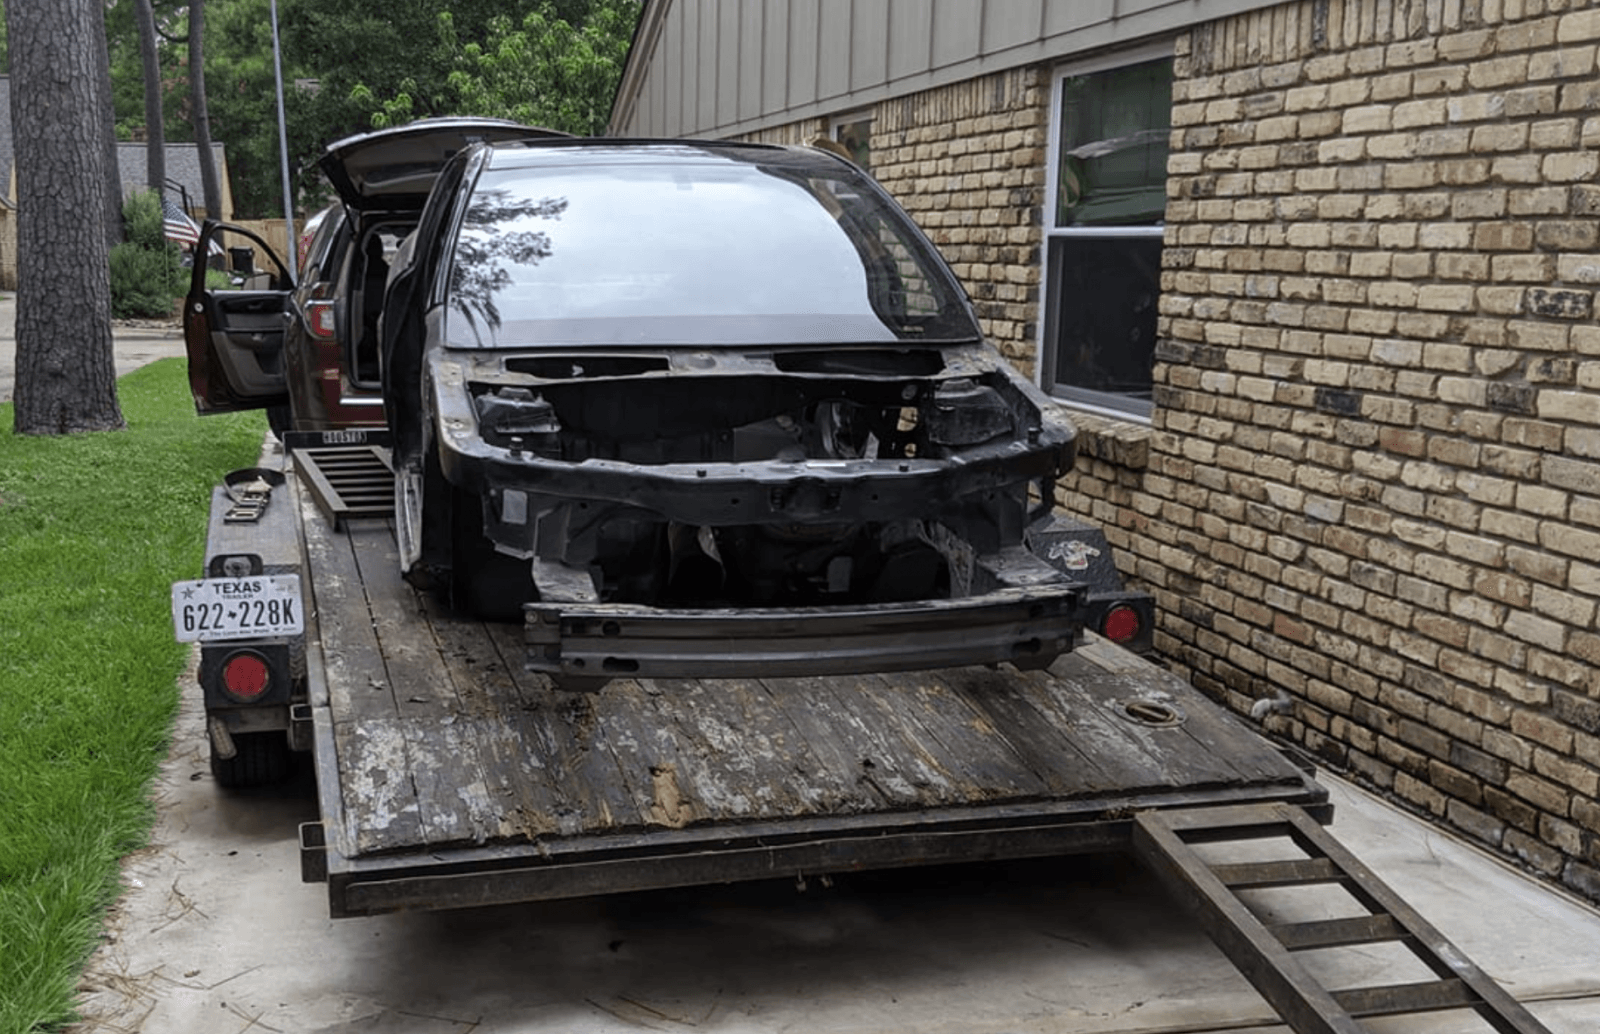
Plan the dismantling of your donor car as a distinct phase. Ideally, do the messy teardown before your kit even arrives. The sooner the donor carcass is gone, the more room you'll have.
If working in your driveway is an option, strip the donor outside and move the pieces you need inside the garage. That way, the carcass is out of the way and ready to be hauled off.
I stripped my donor in the driveway, and did my build in the garage.
After the shell is gone, you’ll have plenty of room to prepare your donor parts.
- Clean off road grime and renew parts with a fresh coat of paint.
- One large task to tackle at this time is reworking the wiring harness. Modern wiring harnesses take up a lot of room when sprawled out across a table. Thin out the harness, extend wires, and make all other modifications BEFORE the kit arrives.

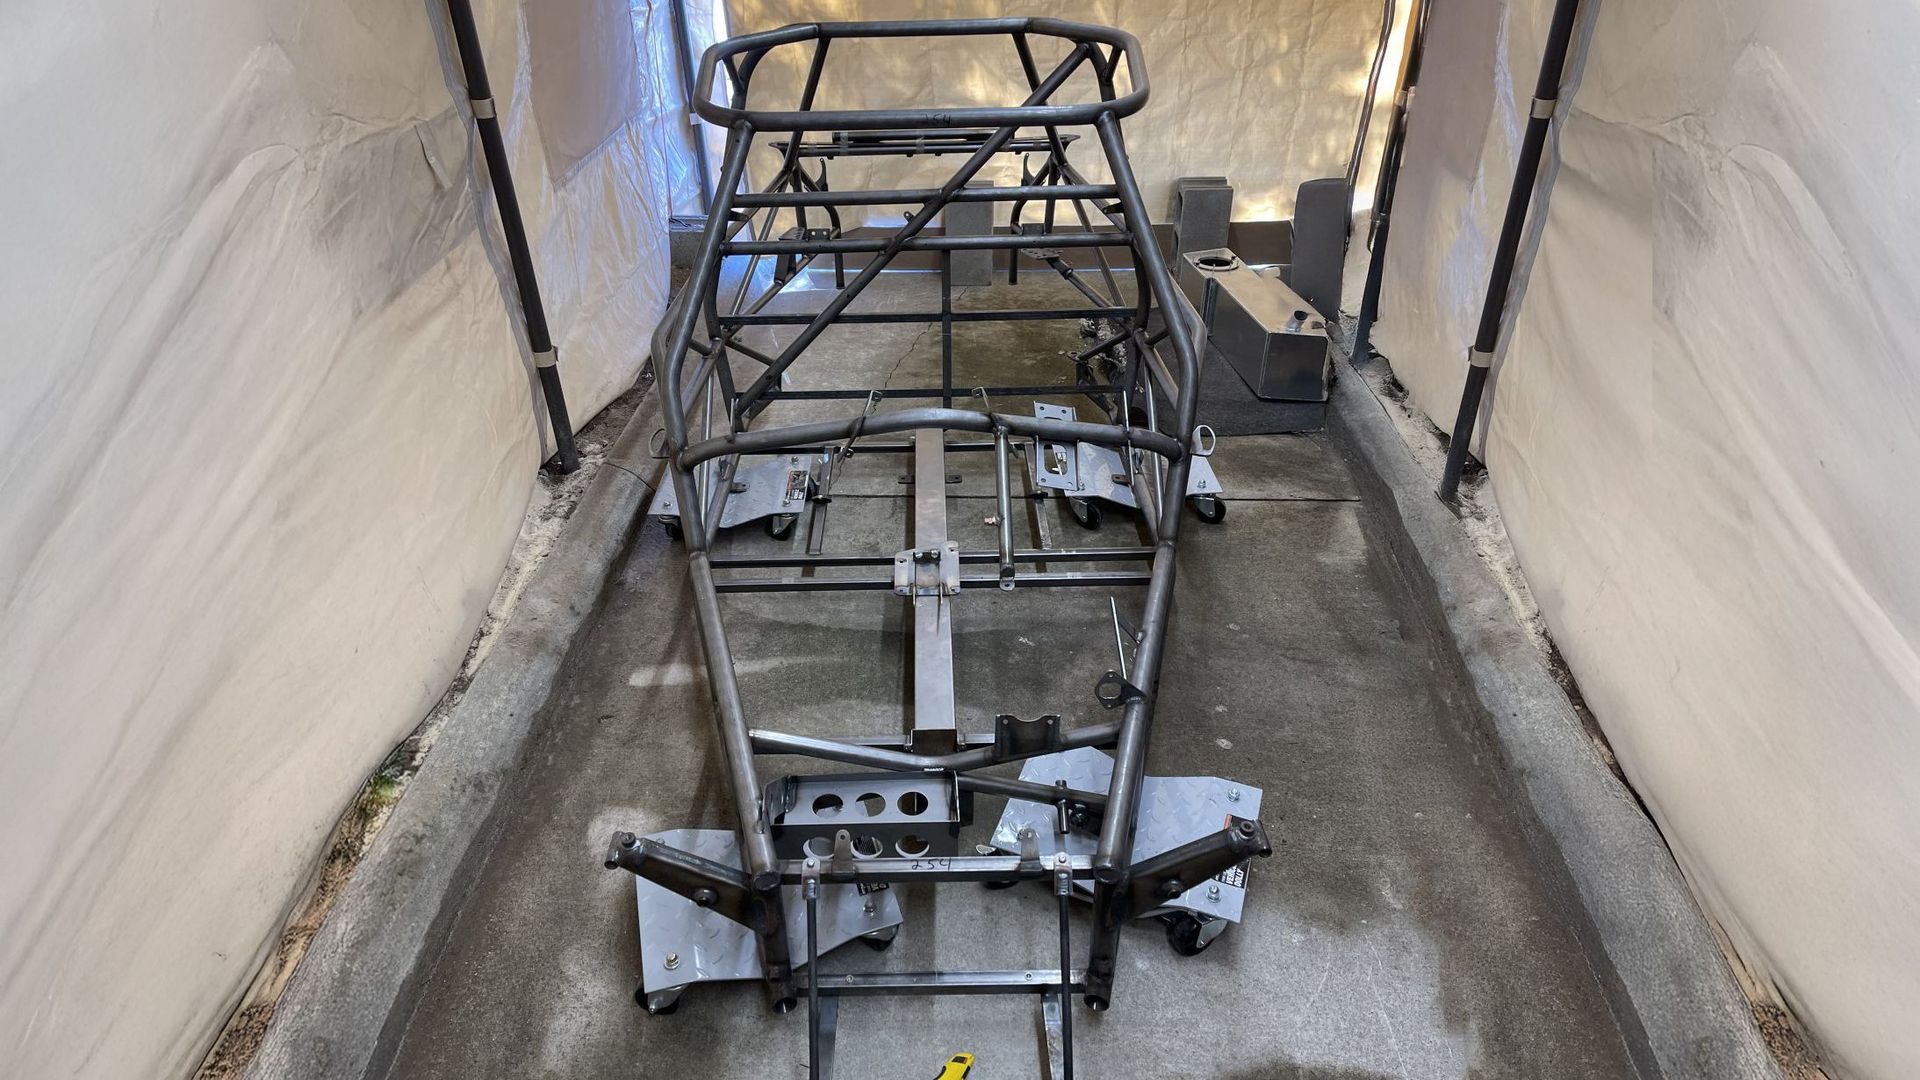
Phase 2: The Powertrain Installation
Once your kit is delivered, the first assembly phase should be about installing the powertrain and getting it fired up.
- Store kit parts unrelated to this task, like body panels, suspension, and brakes, elsewhere.
- Even better, if the manufacturer allows it, have them omit those parts from your first delivery. For example, the DF Goblin is available in stages, with Stage 1 having all the parts to get your powertrain installed and running

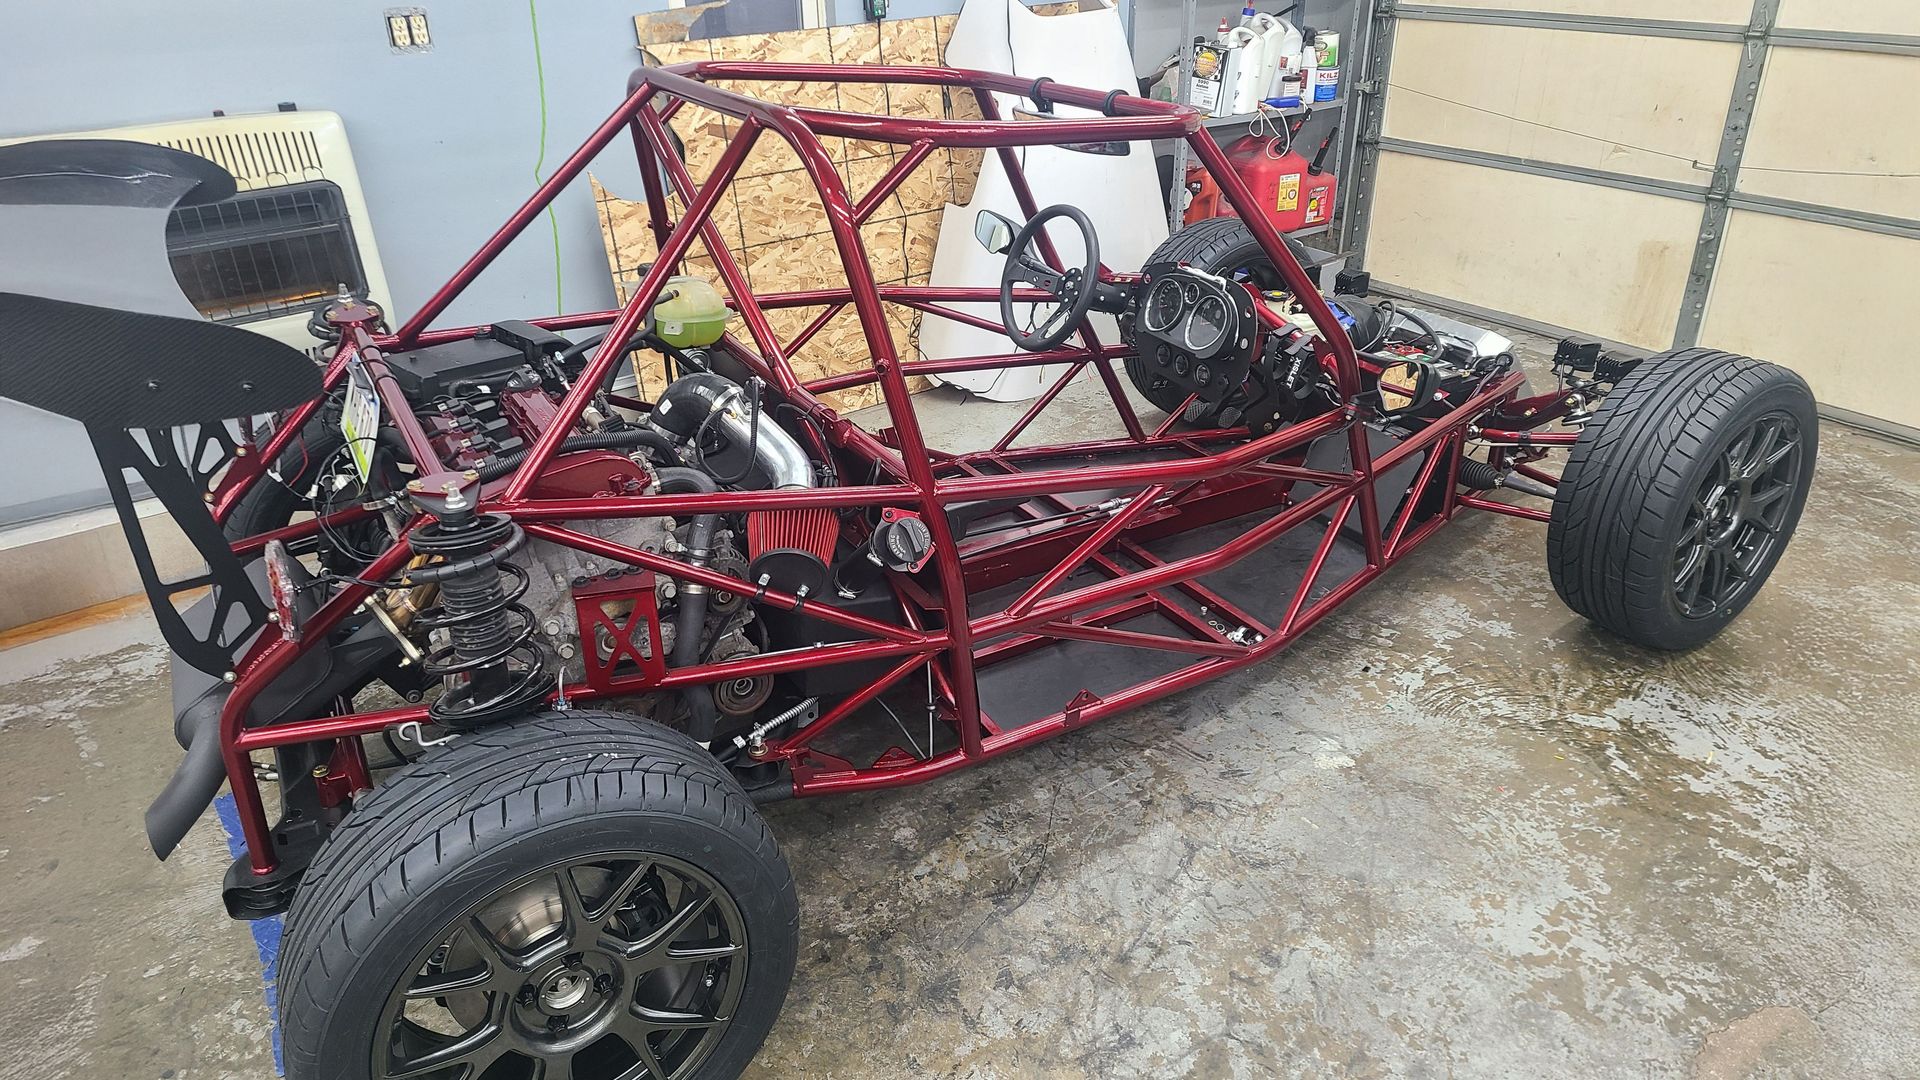
Phase 3: The Roller/Driver Phase
Once the engine is running, tackle the suspension, brakes, steering, and other systems to get the car rolling and driving (Stage 2 for the DF Goblin).
The car will take up more space once the tires and wheels are installed. However, the car will be mobile, making it much easier to roll out of the garage when you need more room to work.
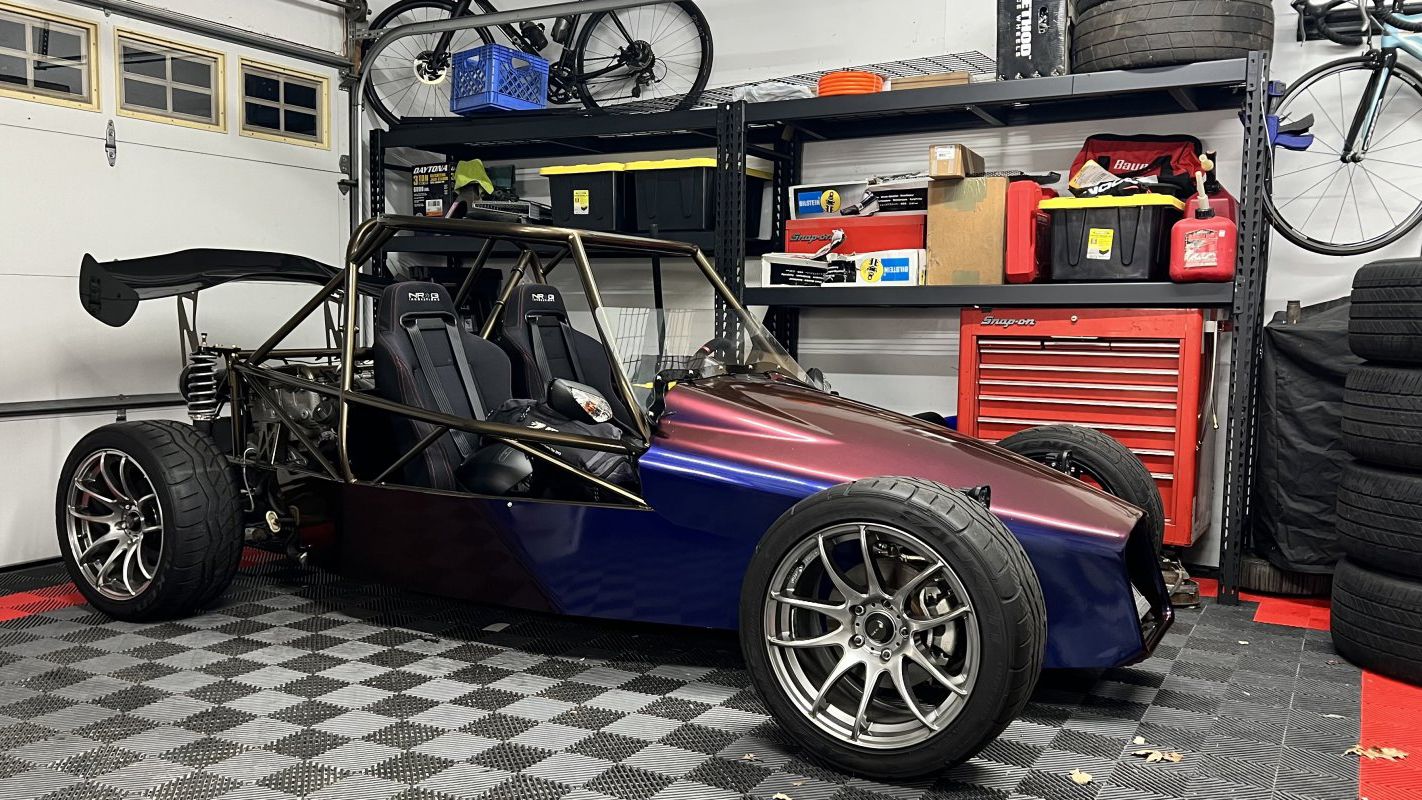
Phase 4: The Finishing Phase
Mechanically, your kit car is close to finished at this point.
- If you are building a full-body replica, you’ll have a decent amount of body work, paint, and panel alignment left.
- If you’re building an exoskeletal car like the Goblin, you’ll have fewer body panels.
In either case, you might find it easier to work on body panels outside to keep your workspace cleaner. This is easy enough to do since the car can roll in and out of the garage on its own tires.
No Garage?
Not everyone has a garage, and that hasn’t stopped determined builders. This might mean working right in your driveway, under a carport, in a temporary structure, or even in a rented unit.
Driveway or Carport
If you have room to build at home but no garage, you can follow all the small-space recommendations, but you must focus on two big considerations: weather protection and security.
- Weather Protection: The go-to solution is a portable garage or canopy. A 10 x 20 ft portable car canopy is a popular size, and builders have used them successfully. If a portable canopy is not possible, you’ll want a high-quality car cover to keep the project dry when you’re not working on it.
- Security: You will be more exposed to theft or meddling. Don’t store tools or valuable parts outside, especially overnight.
Renting a storage unit for a build can give you a fairly inexpensive 10 x 20 enclosed area to work in, but there are complications.
- Check the Agreement: You must check the rental agreement to see if they allow you to work in the unit. Many don’t allow any work on vehicles.
- No Utilities: Storage units rarely have utilities, meaning you’ll need to rely on battery-powered tools charged at home. The lack of utilities also makes things uncomfortable if the weather gets too hot or too cold.
I rented a storage unit for donor tear down. My youngest son helped strip the donor in that 10' x 20' stall (no heat/power/air/electric) in December.
In some cities, you can rent a bay in a shared shop or DIY garage short- or long-term. The principles for working in a small space still apply, but at least you’re in a place meant for working.
If these options don't work, you might have to think creatively or bribe a friend into letting you use their garage. Just keep in mind this is a long-term project, so you’ll need a backup plan if the borrowed space suddenly becomes unavailable.
Conclusion: Finishing Your Kit Car Build
Building a kit car in a small garage is undeniably more challenging. But as we’ve seen, with smart planning and creative use of space, even the tightest workspace can transform into a personal dream-car factory.
A limited workspace is just one more puzzle to solve, and solve it you will. As you take on this journey, keep these thoughts in mind:
- Be patient, be persistent, and enjoy the process.
- Stay organized and safe.
- Don’t be discouraged by what you don’t have; focus on what you do have.
Ready to dive deeper or need advice from people who’ve been there? Be sure to check out the DF Kit Car Forum. It’s filled with detailed build logs and helpful gearheads who can offer tips tailored to your build. Remember, the only dumb question is the one you don’t ask.